Wednesday, May 30, 2007
Sneak Peek
Its been HOT here - or maybe I am just having hot flashes - sometimes it's hard to distinguish between the two. I finished my last dose of medication for the YUK that I had last week, so I am hoping that my body will get back to feeling normal now.
Monday, May 28, 2007
Grateful
Saturday, May 26, 2007
Something for Me!
Friday, May 25, 2007
Feeling Better
I took a stroll in the garden this afternoon to see what's in bloom and I found my Coral Charm Peonies starting to burst forth. As this variety ages it ends up turning a cream color, but the way it looks in the photo above is how it got it's name. This group of peonies we planted 27 years ago when we first moved into our house. It is amazing to me that a flower can keep blooming over and over for so many years. My neighbor has some that are even older. Anyway, my DH used to work for a plant nursery which specialized in peonies and that is where we got these plants.
Does anyone have any plans for this weekend? With both of us so sick, we haven't had time to even think about it. Well whatever you end up doing, be safe and have fun!
Thursday, May 24, 2007
Miserable
Wednesday, May 23, 2007
Flea Market Finds
Well, I finally got all my flea market finds from the weekend unwrapped and washed so I thought I would share my good fortune with you. I couldn't believe how many things I was able to find in my favorite color combination - pink and aqua. The vintage glass ornaments (still in the original box) were a steal in the various shades of aqua and silver tones. I think I should have bought the box of pink ones too - why didn't I? Dumb! The aqua drinking glass is just like a set of red ones that I have, but I have never seen one in aqua, so of course it called out to me "pick me, pick me." The little pink Pyrex-type bowl and pink crochet pot-holders were irresistable. And the aqua cups will be perfect to use at the cottage. I have a small collection of milk glass that was my grandmothers, so the little candy dish will be an nice addition to that. The porcelein roses were broken off of something, but that didn't matter because I like them better this way. I already have a plan for the broken pearl necklaces, rhinestone earrings and the sweet little perfume bottle with the pink cap. And I can never pass up a few vintage postcards, especially the one with 1910 on the front, which happens to be the year my grandparents were married.
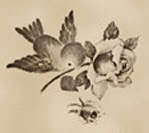
I couldn't believe my luck when I stumbled upon this basket full of vintage victorian clip-on bird ornaments. We all seem to be in love with little birdies lately.
Here is a close up of one of the little bird ornaments. Some of them have little tiny pearls for nostrils on their beak. . . cute! And this vintage bird book with that amazing image on the cover is to die for!
Okay, who could resist this darling aqua sewing basket with the floral decal on the lid? Certainly not me!
And then there was this set of paper bird coasters. . .I just couldn't believe my luck! Somedays I go to the flea market and find nothing and go home rather bummed-out. But this time I really hit the jackpot! Yipee!
Monday, May 21, 2007
Gel Medium Transfer Tutorial
2. Cover the area where you want to place the transfer with a coat of Gel Medium. I used Golden's Soft Gel Medium in Matte. I have heard that you can also use Regular Gel Medium as well, but I personally find the regular consistency too lumpy for my taste. Some people prefer to coat the right side of the image with the gel medium instead. I really don't think it makes any difference in the transfer. Again, I would say to try it both ways and see which works better for you.
3. Place the image, face down, into the wet gel medium (as if you are gluing the two papers right sides together - I know, it sounds scary!) and burnish with a bone folder or the back of a spoon. I always follow up the burnishing by rubbing my fingers over the back of the image just to make sure that there are no lumps of gel medium left. Also when burnishing, try not to let the paper with the image slip and slide otherwise your transfer will smear and be blurred.
4. Gently lift up a corner of the image and slowly peel it away. As you peel, check to see if the image is transferring. If not, burnish a little more. Now some people wait until the gel medium dries completely to remove the image. (If using this technique, you will need water to dampen the back of the image slightly while you rub the paper backing off with your finger.) I have always been too chicken to do this, for fear that I won't be able to remove the paper. So I just peel the image away within a minute of burnishing. But this is where it would be good for you to test the process on a scrap piece of paper, similar to the type you will be using in your project, just to see which technique is best for you. Also, keep in mind that if you are doing this in an older book like me, old book pages are very dry, brittle and porous so the result may be different than if you did it on scrapbook paper. I suggest you take the time to experiment to avoid any heart-ache due to unexpected results. (Note - if your image transfers/peels cleanly, you will be able to save the original paper, which will now have a fainter version of the original print still on it, and use it for another piece of artwork. It's like getting two images for the price of one!)
5. And Voila! Your image has been transferred!! If you'd like to read an article on everything you ever wanted to know about Gel Medium Transfers you can go to Zeitgeist Art Gallery. Be sure to scroll down to the bottom of their page for step by step how-to pictures. Lynne Perrella also writes about how to do Gel Medium Transfers, as well as other types of transfers in her book, Artist's Journals and Sketchbooks. You can read an exerpt here. Also Holly Harrison's book, Altered Books, Collaborative Journals & Other Adventures in Bookmaking has more information on these types of transfers. Here is an exerpt from her book.
Whatever method you try, have fun with it. Art is full of experimentation and trying different techniques. And remember, sometimes the best art comes from those happy little mistakes we make along the way. Have fun, and feel free to contact me if you have any questions!
Sunday, May 20, 2007
Woo-Hoo!
Monday, May 14, 2007
A New Week, A New Project
The page below was the result of a mistake. I completed the background and finished applying the paper diamonds. At this point I usually put a piece of waxed paper between the wet pages so I can work on a new page. I forgot about waxed paper this time, so the pages stuck together. I wasn't too happy about that. : ( However, I was able to unstick the pages without too much damage, so I applied more glaze over the part that was stuck and it ended up adding more texture to the page and I like it so much better now. I love those happy little mistakes, don't you?
The page below is my favorite so far. I did a gel medium transfer of the bird and nest image and it turned out perfectly. Sometimes when I try this technique it turns into a big mess. This time it didn't. Hooray!
Friday, May 11, 2007
What the Heck?
Thursday, May 10, 2007
I'm a Funky Find
Monday, May 07, 2007
Birthday Surprises!
More Botanic Garden Lovlies
There are some wonderful pieces of bronze sculpture at the gardens as well. Below you will find a rugged sculpture of Linneaus, a pair of mallards, a heron and a fun little fountain.
Sunday, May 06, 2007
Looking for Solace
Thursday, May 03, 2007
Frustrated!!
Wednesday, May 02, 2007
This and That
Ali Edwards wrote about spring cleaning in her AEZine newsletter this week. All my friends have decluttering on their minds too. We all collect different things, but it doesn't matter because in the end it all takes up space. It is especially difficult for me because I have a hard time parting with things. I don't usually have things around that I don't like, so what do you do when you like EVERYTHING and can't decide what to get rid of? Then I saw Susan Tuttle's studio space here. What a darling place she has to create in! I love the colors and all the pretty storage boxes and hanging spools of ribbon and how the sewing machine is out and ready to be used whenever the mood hits. Many of you are lucky enough to not have to put the your sewing machine away after each use. I am so jealous! Anyway, after I stopped drooling over Susan's studio, I decided to reorganize my own art room - AGAIN! (Hey, I am a Virgo, so what do you expect!!) However, this time I am going to be much more ruthless when it comes to getting rid of things. I HAVE to be!
I think it is fun to see where other people create. I will post some pictures of my art room when I am finished. If you'd like to share your creative space (or someone else's that you love), why not leave a link in the comments section of this post.